

Trying out new things in the garden is a necessity year after year. A soil blend you like might be out of stock or reformulated badly, so you have to give something else a try. Last year your favorite tomato really beefed it and got ultra blighty or aphidy and you now know sun-gold is no longer viable in your area.
I however will forever stick to my favorite cucumber seed of all time, the telegraph improved English slicer because I am a stick in the mud who stumbled upon the perfect blend of mildew and idiot resistant cucumber seed that tastes amazing- and I likes what I likes.
The mildew is powdery- The idiot is me.
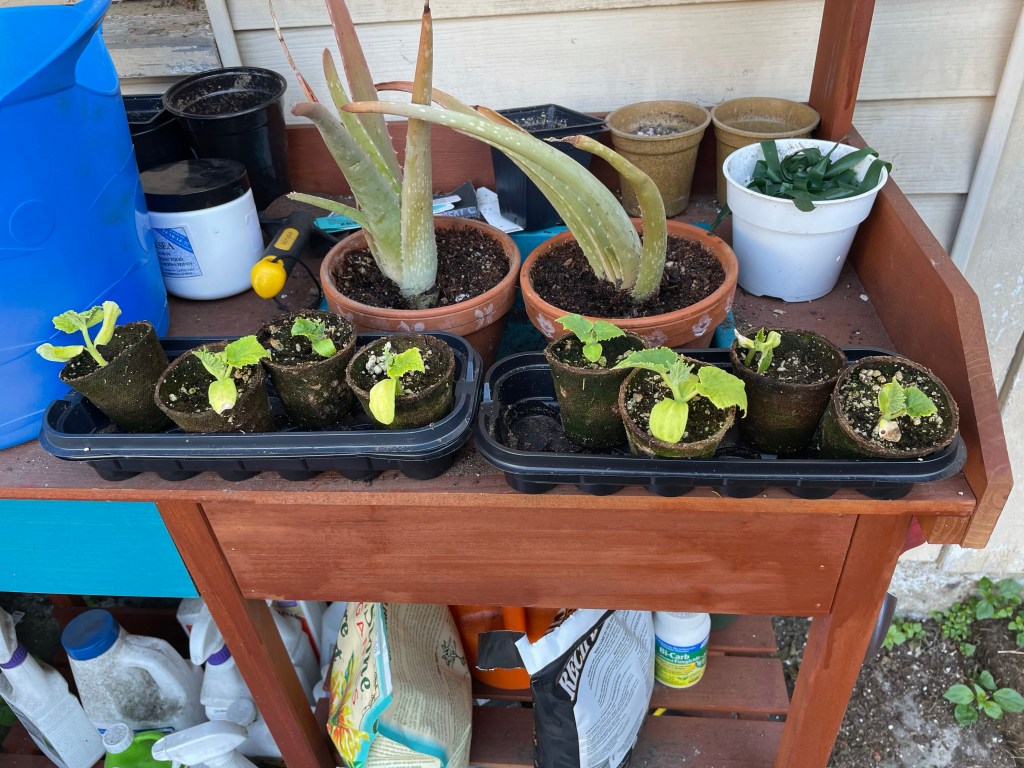
They are sadly a type of cuke that I’ve not often found in starts- but that’s fine, cucurbits are easy to start from seed.
Of course they don’t love their roots to be terribly disturbed so it’s better to grow them in biodegradable pots if you aren’t going to direct sow which is totally what you should do- but again- idiot.
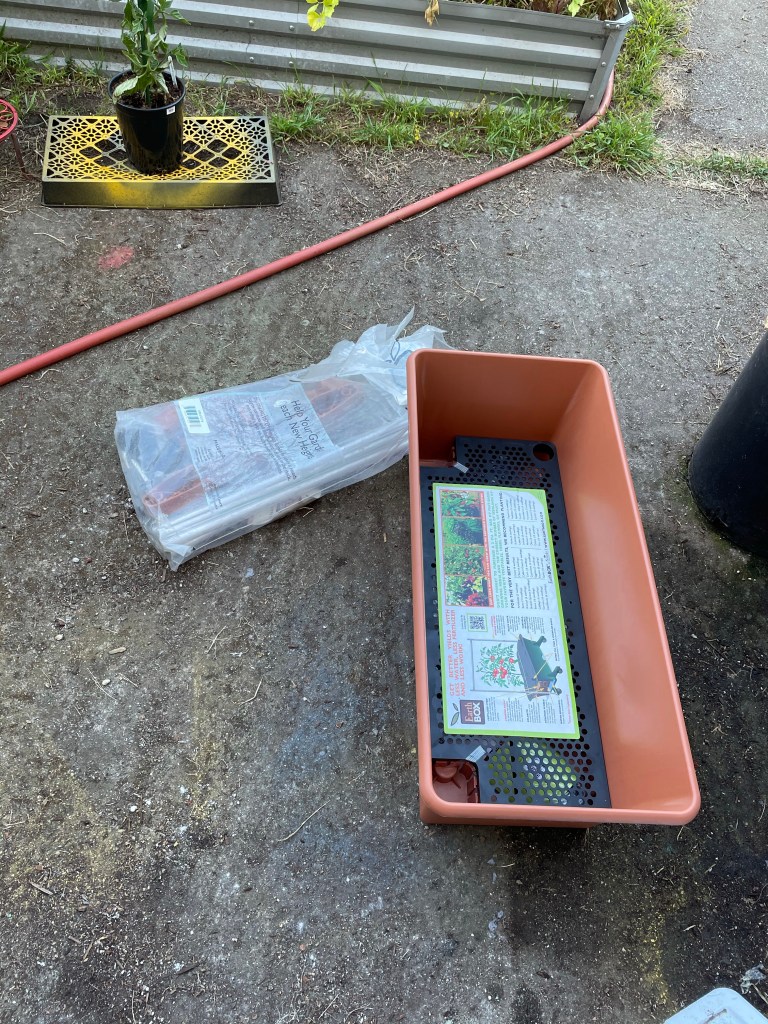
I really love cucumbers, and so does my dad. Pickled or raw, we can easily mow through as much as nature can throw at us. So a while back I picked up one of the newer grow-box systems on the market that promised high yields and less work. Always a sucker for both of those things, especially in a year when it seems that every aphid in the world is swarming my garden, I thought I’d give it a try for at least some of my cukes. All the fertilizer is included and it’s a self-watering system, just add soil and time.
These boxes are more marketed towards apartment dwellers or folks with limited square footage, but what attracted me was the optional trellising system that you can affix to the main unit for training your plants. Training your cucumbers up is the best way both for space saving issues and for the pernicious powdery mildew in San Francisco.
Mildew-resistant I said. In San Francisco nothing is mildew-proof.
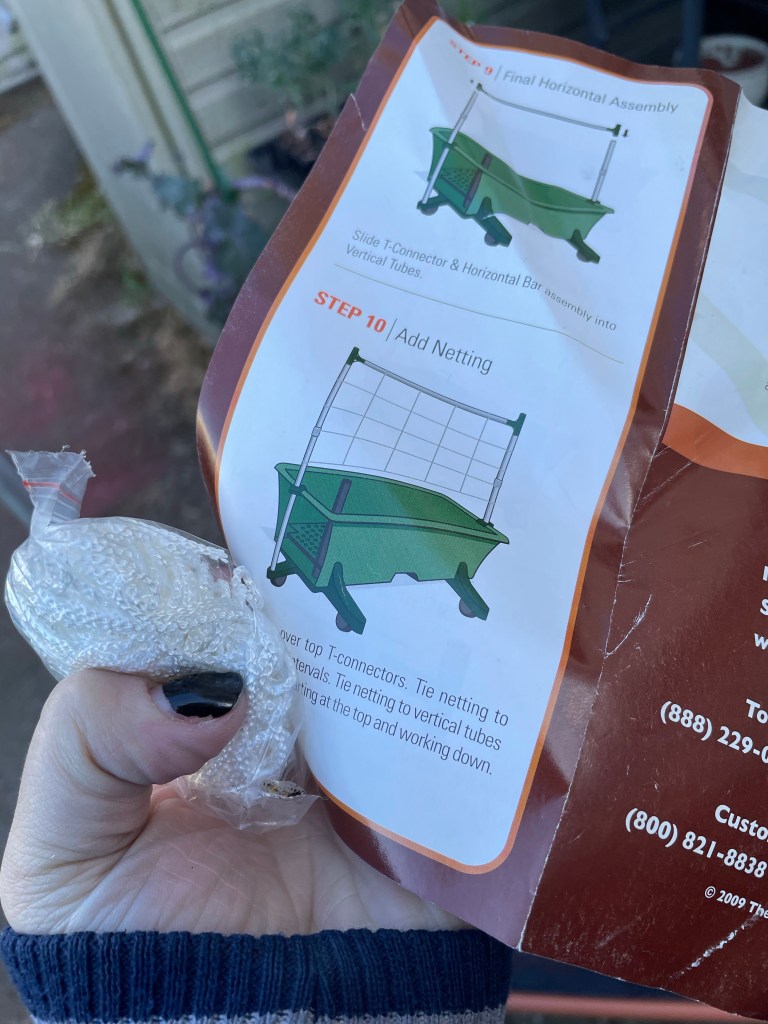
I wont lie- some of the instructions were pretty bad. Lots of good illustrations which was the saving grace but several steps related to the attachment of the trellis supports were not clear until you put the dang thing together and realized something wasn’t right.

Even though its gonna be on grass pretty much permanently I did attach the wheels because it will make inevitably having to move it at some point easier, and because if I put the wheels in a drawer somewhere to attach at a later date- I would never find them again.
You’ve gotta know when to hold them, know when to fold them, know when you’re the kind of person that will put something crucial in a safe place for safe keeping and then never be able to ever find it again.

It’s honestly a pretty cool system with a few easily fixed flaws. There’s a reservoir for water that is fed by the tube that sticks up to the side. It also has a spout on the bottom that drains excess. So you can’t overwater! They recommend some proprietary soil mix which is not my jam so I just used some basic organic potting. But they do include some dolomite to put down on the bottom- crucial for fruiting veg like cukes to avoid blossom end rot- and some long term release granular fertilizer.
They even have instructions for planting depending on the veggies you’re growing- in the cucumber configuration you’re supposed to put 4 plants on the top and the fertilizer on the bottom. For once I followed instructions.

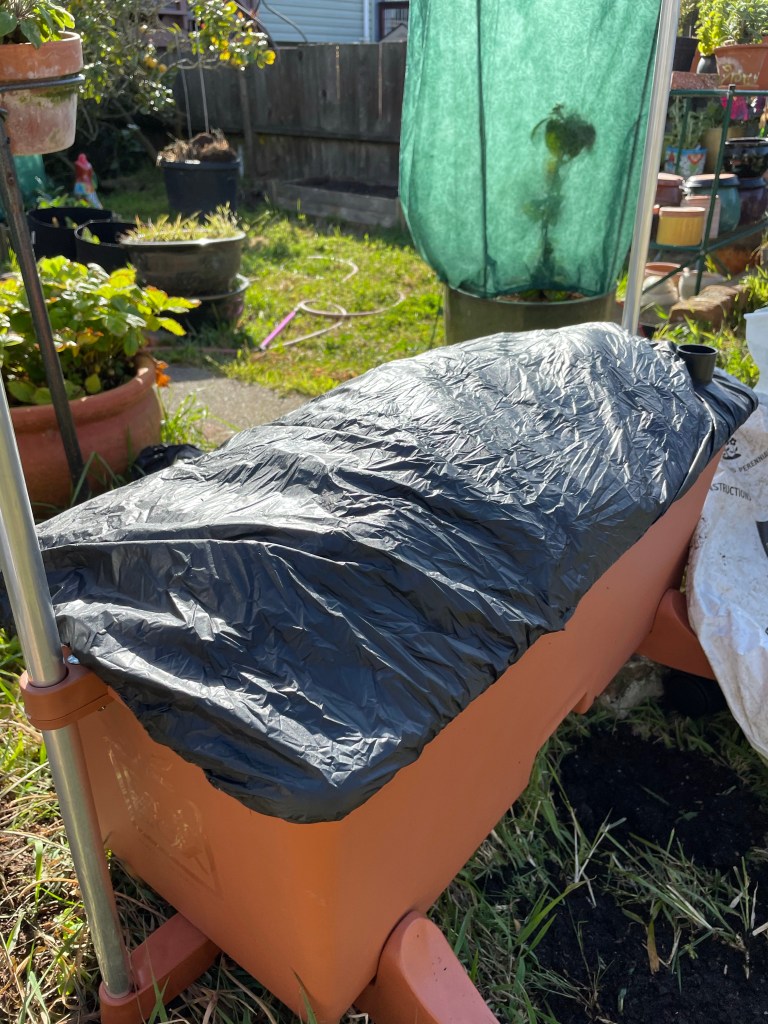
Here’s where things got moderately dicey. You’re supposed to mound up the soil so that you can pull the plastic mulch cover taut. This was largely an exercise in getting dirt all over my sandals. Also- no one tells you that if you’re using the trellis attachment…
That you have to put the mulch cover on first and then clip the attachment to the box over the mulch cover. Even though they tell you in the trellis attachment to attach the trellis before filling the box with soil…
Small potatoes- but yeah. Not ideal. I had to at this stage disassemble the trellis attachment and reassemble it.
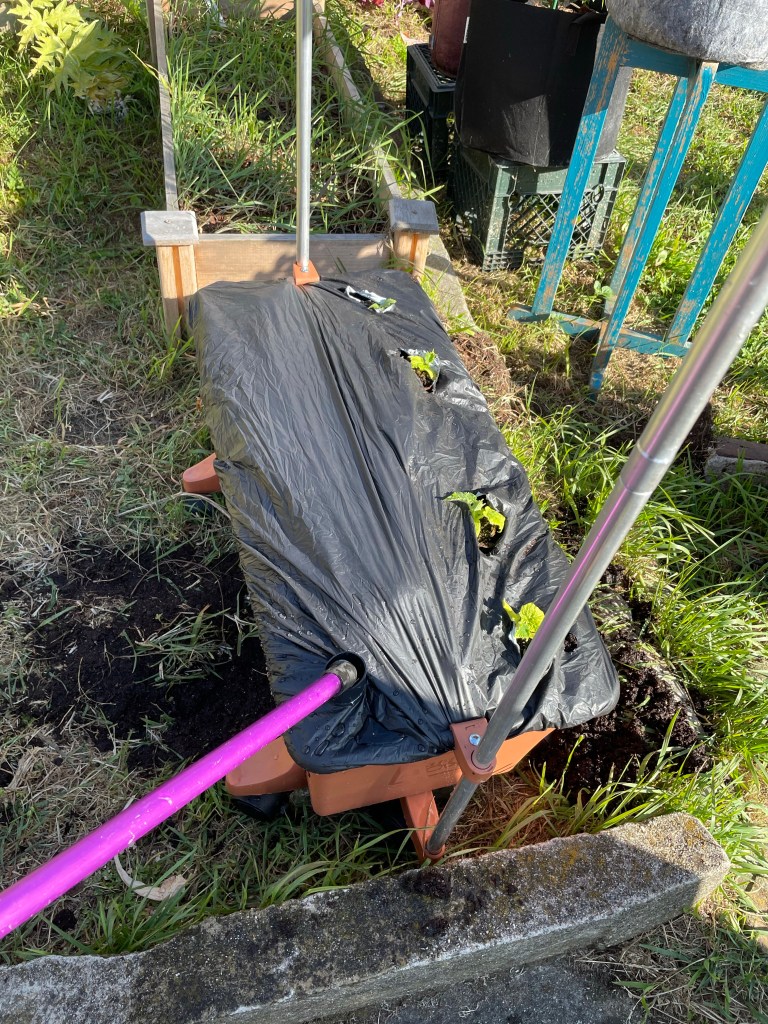
That’s when I ran into problem number 2. Just cutting holes in the fabric to plant is easy enough- but as you can see the plastic mulch cover has a real tendency to bunch up and cover the baby cukes- less of a problem I suspect if I had planted full size 4″ starters instead of this mess. I did come up with the perfect solution to keep the mulch cover from flapping in the breeze though.
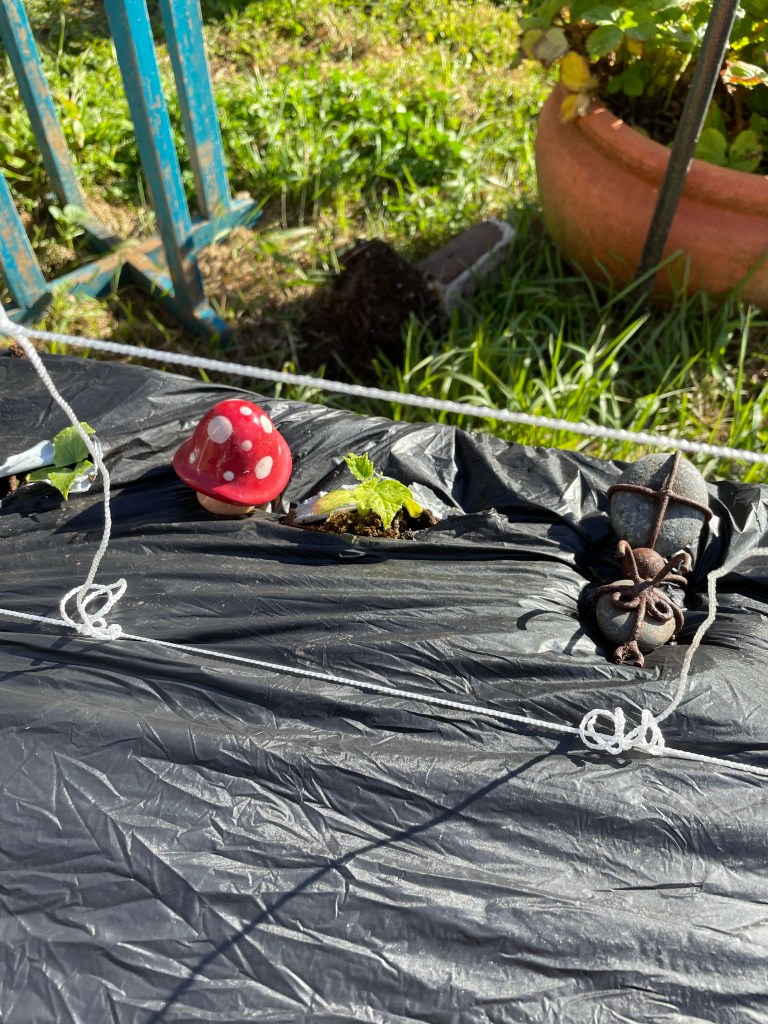
Score 1 for having nearly a decade’s worth of random garden tchotchkes I guess.

Then it was just a matter of tying the netting to the supports.
So far so good- but it’s gonna be at least a few weeks before the long term viability of those seedlings shows. Fingers crossed- if they die and I have to go buy 4 cucumber plants that aren’t Telegraph improved you’ll be able to see a silly tantrum from space.
Look. Everyone is allowed an opinion on the best cucumber for growing in San Francisco- mine just happens to be correct.

That is a lot of infrastructure for cucumbers. Mine got sown on the edge of the driveway, and climbed up and over the junipers. They were not as good as they are from cooler climates though. It does not get too hot here, but the driveway enhances the warmth. I know what varieties of vegetables (although not cucumbers) perform best in my garden, so I have no doubt that you know what does best in yours. If I did, I would not say so.